Configure Office 365 Email DNS records in a WordPress CPanel
Step One. Login to the CPanel.
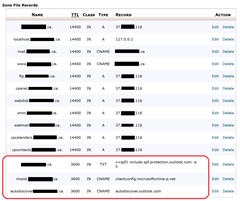
Step Two. For TXT and CNAME records, in the CPanel’s Domains section, click on Advanced DNS Zone Editor . Add the following records.
foobar.ca              3600 TXT   v=spf1 include:spf.protection.outlook.com –all
msoid.foobar.ca        3600 CNAME clientconfig.microsoftonline-p.net
autodiscover.foobar.ca 3600 CNAME autodiscover.outlook.com
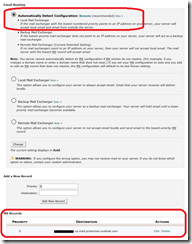
Step Three. For MX records, in the CPanel’s Mail section, choose MX Entry . Then choose Automatically Detect Configuration. Then add the following record.
0 foobar-ca.mail.protection.outlook.com
Remember to save at each step.
![]()
Screenshots
What does it all mean? This Office 365 email article explains the role of each of these records. Here is the Reader’s Digest version.
- MX Record. Tell email send to [email protected] to go to Office 365.
- TXT Record. The `spf` record prevents spam email.
- CNAME. The `autodiscover` helps with the setup of Outlook desktop clients.
- CNAME. The `msoid` helps authentication for various client apps (e.g. Skype.)

